Pages

Showing posts with label Tim Holtz. Show all posts

Thursday, December 27, 2012

Holiday Break Arting

Hello everyone and Happy Holidays/Merry Christmas! I hope you are able to take some down time during this time of year and refresh and regroup for the upcoming new year. I've had time to create something almost every day so far. Some were for Christmas presents, some were for our home. Have a look:

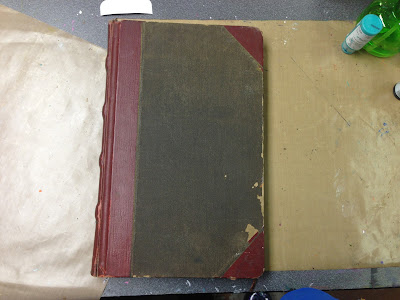
 I've been looking for a reasonably priced vintage journal to use as an art journal -- once again, Etsy to the rescue! 

 Really cool tabs in the front of the journal. 

Lots of pages that have the original entries. How cool is that?

This is the first journal page I did in it. I love poppies and the poppy pods. Any my favorite Golden's Fluid Cobalt Teal seemed like the way to go for my first page! I adhered some of the Tim Holtz tissue roll, then some Golden's Airbrush Paint in white over that. Some oil pastels to finish off the shading, and my water brushes with Dylusions Ink for the stems and the spikey parts. 

 Another spread I did with a map of Maryland glued down first. My hometown of Dundalk and my current home in Severn are highlighted with the hearts. Other favorite spots highlighted in the other circles. I used my new Shiva PaintStiks to highlight the circles. 

 So I have this new little 'signature' thing I've been doing, the gesso'd circle with the black rectangle off to one side. So simple, but for some reason this really appeals to my eye. You will start seeing this in a lot of my work! 


 I almost always lean towards turquoise and the cool colors, so I decided to challenge myself with an all warm page. The first layers was using all my red NeoColor II's. Then I adhered a floral napkin with a poppy pattern to parts of both pages, added my Donna Downey large poppy stamp, and used my water pens filled with Dylusions inks to add some highlights. Some gesso and some dabs with my Montana Acrylic Marker. 


 These next shots are of another page I did using my favorite new product -- Viva Decor 3D Crystal Gel in Hologram. Really fun, awesome stuff. 


 This page was in my Dylusions journal experimenting with Dyan's bleach out technique. 


 Then I moved into some canvases. This one was made for a friend who asked me to do one in black, gray, and fuchsia. I really like the way this one turned out! Its going to be hard for me to part with this one. 


 Then I decided to do a canvas for my nephew Zach and my niece Chelsea. This is Zach's. He's really into music and recently painted his bedroom in blues and yellows, hence the color choices. I was so thrilled last night when I popped over to the Dyan Revealey FB private page and this canvas was being used at their banner on the website! WOW! That was such an honor for me! 


 This is the one I made for Chelsea. It holds a lot of significance for us. We lost Chelsea's Mom and my beloved Sister-in-Law two years ago. We think of her as a yellow butterfly, and Chels always says Mom was my anchor. The hearts are self explanatory. Chelsea was very touched by this one which made me feel really good about making this for her. 

 My husband keeps telling me I should do a set of canvases that could be hung together. I wanted a set of two longer canvases, but when I ran out to Michael's on Christmas Eve, this is the only split one they had. Its 4 panels each 6 x 6. I made it for our bedroom which is also decorated in turquoise and chocolate. I really like how it turned out. The drippage as a combination of Dr. Ph. Martin's Teal India Ink, and another brand of teal iridescent ink I blended together. I splattered the canvases with this as well. 


 So guess what I'm getting ready to do??? Head back downstairs to play some more! I have another canvas I want to do in dark reds, and some shades of brown and gold for our living room. I also want to modify the Perpetual Journal Calendar for myself. I got a really cool sewing machine drawer from Etsy to use instead of my basket, and an aqua Ball jar to use with it. I saw a really cool idea on Pinterest. I'll share that one when its finished. 

Saturday I'll be playing with some of my art besties - Ellen Smith Vargo, Donna Walsh, and Terry Quinn at The Queen's Ink! Man, I could so get used to being off work and doing art every day, but I'll need to acquire a taste for cat food if I think I'm going to retired any time soon! LOL! Luckily, I love my job. 

I wish everyone a very healthy, happy, and creative new year! Happy 2013!!!
Monday, December 10, 2012

Altered Cigar Box Frenzy!

First, I want to thank my members (WOW - I have "members"!!!) and all those people who have commented on my art projects and given me such wonderful feedback. I really appreciate you taking some of your time to spend looking at my works. 

I decided to do a quick post showing you some of the cigar boxes I've altered. I like to call them Keepsake Boxes. I took a class last winter with Patti Euler at The Queen's Ink to learn her techniques for this process. She has some fabulous pieces that she's done displayed all over her shop. When I heard she did classes teaching how she turns old cigar boxes into such cool works of art, I was all in. Its a lot trickier than you might think and Patti passed along some of her tips that make this much easier than if you'd grab a box and some paper and try to do this from scratch. If you are anywhere near the Savage, MD area, check out The Queen's Ink website for their class schedule. Patti has regulars that travel in from out-of-state for her classes, so don't miss out on the opportunity she offers her customers and students. 

Here are some of the ones I've made: 

This is the first box I made in class. Pics aren't great of this one. I was taking a few quick pics at my desk at work before I gave it to my niece Chelsea. 

 Patti taught us to decorate each surface of the box, top, bottom, inside, outside, and all the edges. It really does make the end product very special. 

 Even the bottom gets some special touches.  

It's tough to see the butterfly that's 3D on the top. You may recognize the Tim Holtz metal legs. They really give the boxes a professional look and make them very sturdy.

As you probably remember, I don't just do one or two of something. If I like the process, its on baby! Here are some pics of my second box, third, fourth ... you get the idea! 


Then I got the idea to make a box for my Mom with pics of she and my Dad with my brother Skip and I as kids. We just lost my sweet Daddy a couple years ago, and I knew this would be something special for my Mom. She loves it! 


 Yes, those are pics of me when I was 3 and 4 years old. That little knucklehead  in the bow tie and suit is Skip. 

 My handsome Daddy at about 17 years old when he joined the Army Air Corps in WWII. Oh yeah, that little tramp rockin' the 1947 bikini -- that's my Mom! (Clearly I didn't get many of her genes!) LOL 


That's a hat for the Easter parade if I've ever seen one! I notice a theme here -- yet another bow tie for little Lord Fauntleroy! Ha!!!  

Then I progressed into other 'themed' boxes...starting with the wine theme...

 I should have retaken pics of these. This was taken before this one was finished. I've since added a champagne cork as the handle to open the lid. This one is going to my friend Gail as part of her birthday present. 


And the clock theme...


Followed by the garden theme...

 I used some tiny wooden flower pots I got from Michael's for legs on this one. Thought it was more fitting for this theme. I painted them with Silks. 


And then the tropical theme...

 Sometimes the boxes choose their own theme due to the colors of the foil edges. 


 I really like that black background paper against that bright pop of yellow when you open the box. 


I eventually let my paper stash guide help guide me to the theme of the boxes...Girlfriends...

 I put some wooden balls with a flat top I found at Michael's for the legs on this one and painted them with a really pretty bright pink Silks color I had. 


A friend asked me if I could make a box with a dragonfly theme in purples and golds she needed for a gift. Here's how it turned out...

 I did this box while I was away at Stamp Camp, so its not complete in these pics. I added a stack of various colors of lilac buttons as the handle for opening the lid after I got back home. 

 The 3D embellishments aren't showing up as much as I'd hoped. That silver dragonfly at the top left is a 3D metal embellishment that was really cute. The fleur de lis is a 3D embellished as well. 


This one is a Christmas present for the newest member of our family, Giana. She's going to be 14 soon, I hope she likes it. 


 I wish the knob showed up better here. Its one of the Tim Holtz clear glass screw on handles and I added a little bling on the top just to dress it up a bit. 


In the future, I'm going to put more effort into taking better pics of things that I plan to post. Most of these works are things that I'd done before I started my blog, which was just a couple weeks ago. Some of these are gone from my hands now, so I wasn't able to retake the pics. 

*****************************************************************

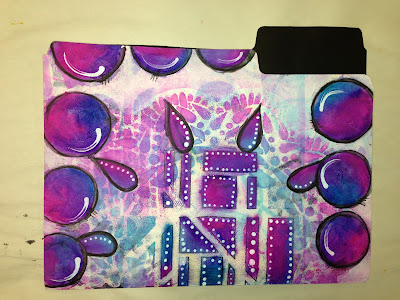
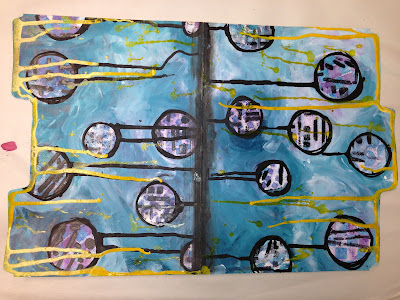
Since everyone seemed to like my painted folders, I thought I'd show you ones that I made yesterday. It was such a grey, yucky day outside, I decided to get inky. (I do the same thing on sunny days, just sayin'!). I made three yesterday, but I'm only counting two of them as successes. No matter what I did to the one folder, it just kept going from bad, to worse, to really bad. But, now that I look at it with a fresh, less disgusted eye today, it just may grow on me and not end up in the place all old unloved folders end up! 

I really like the way this one came out!  Below is the folder laid open so you can see the front and the back sides. 


Same here...


And here's the problem child. Looks a little better to my eye in the light of a new day! 


Thanks so much for stopping by! More to come soon!