Pages

Showing posts with label Dylusions Spray Inks. Show all posts

Tuesday, February 12, 2013

New Video for Artistcellar Blog, New Gelli Prints Too!

Hello again everyone! I know its been a while since my last post. Its been crazy busy plus some downtime for a cold/sinus thing. Doing much better now and wanted to share with you my latest post on the Artistcellar blog. You can also link directly to the video here.

Here are a few pics of my project in the video using Artistcellar Cathedral Series Stencils - LOVE!!! 

 I started with a layer of black gesso, then went a little crazy. 


 You'll have to watch the video (ha ha!) to see how I got this look within the stencil pattern! ;o)

 This is a close up of the Viva Decor 3D Gel in Hologram I used thru a stencil. I love this stuff and it really pops on the black gesso. The black actually looks brown on this shot due to the angle and the overspray of the Dylusions Inks

Using some Stewart Gill Gilding Chips here. Really cool stuff and tons of colors. You can buy this from Artistcellar

***************************

I've been up to some more gelli printing! If you decide to try it, please be prepared to seek help from a professional counselor! IT IS ADDICTING!!! You'll be in need of a 12 step program for sure, but what a way to go! So much fun. (If you decide you want to buy one anyway, check out The Queen's Ink if you're in the Maryland/DC area, or you can buy one directly from Gelli Arts

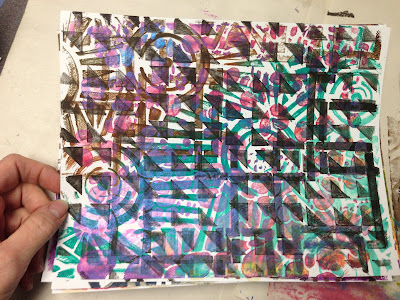
Here are a few of my latest prints using some of the newest Crafters Workshop stencils...

This one was a mop up of my dirty plate, but I love the way it came out. 

 This is a close up showing the detail that it picked up from previous prints. LOVE!!!


Quick post today! More coming soon, I promise! I've got some projects people have asked me to do including several canvases and some altered cigar boxes. I'll post pics of those as I go too. 

                                 ***************************

On another note, many of you know we lost my Dad in July of 2010. Today is his birthday. He would have been 88. Love you Daddy and miss you like crazy! 

 Me and my Daddy!

 Me and my Daddy 50+ years later! 

Handsome devil, wasn't he? ;o)

***************************

Now go have some fun and get all inky!!! 

Friday, December 7, 2012

Inky Folders - Make Some For Your Workspace!

Several months ago, I took a few online classes with Roben-Marie Smith. I've always loved her style and wanted to learn some of her techniques to blend with my own hand. One of her classes was called Mixed Media Mayhem, where she teaches you how to ink up some manila folders, then turn them into journal pages bound with a canvas cover. Well, not being a seamstress, (although, when I signed up for this class, I immediately went out to www.overstock.com and purchased myself a refurbed sewing machine for the killer price of $49.99! - it's still wrapped in the plastic it shipped in, by the way!), I never completed the journal, but found myself with quite a few inked up manila folders. 

We were about to move into a brand new office building at work, so I got the brilliant idea that I'd make some painted folders for my new cube to add some artsy color to it's bland squaredom (is that a word?). So every time my husband saw me taking so much time painting a manilla folder, he'd say -- Babe, if you're going to paint something, why don't you paint on a canvas? Trust me, we don't have near enough wall space to display half of the folders I've made, let alone hang Lord knows how many canvases all over the place. (God love him, he just doesn't get me sometimes!). 

So I continued to go crazy getting inked up like a smurf on crack, stencils all over the place, gesso everywhere, oil pastels and watercolor brushes strewn across my desk, pages and pages of newsprint saturated with all my excess ink, all in an effort to get my folders finished by the time we moved into the new space. 

After I had a bunch painted, I was trying to decide how I was going to put the names on the index tab part of the folders. Again, Etsy, being my go-to spot for all things unique and unusual, I found a site that sold black labels and white chalk ink markers. I ordered some of those, but the labels didn't work the way I wanted them to. Then it hit me one day, why not put black gesso on the inside edge and index tab and use the white marker on that -- GENIUS, if I must say so myself. The black edges and the stark white ink really make the folders pop. I've had a lot of compliments and a number of people that just come over to visit my cube and see the folders I made after someone has told them about it. 

Here are some pics of how my folders turned out: 


Yes, the sign on the back wall says "Hot Flash". That was my license plate for my golf cart at one of our annual sales conferences! 


These two are a couple of my favorites!

 I did the center one and the one on the right at Stamp Camp. The one on the right was done with Dylusions inks, salt, then stenciled with an off white chalk spray. 

 Did these at Stamp Camp. All the circles on the left were collaged onto the folder using some 'puke on a page' sheets a la Dina Wakley. The one on the right I used Golden's Black Lava Medium to do the punchanello circles. It gave them a really cool texture. 

 These were done at Stamp Camp too! I used Peerless Watercolors to paint over the spray inks to emphasize the spikes in the stencil pattern. And I used my Montana Acrylic 15mm nib black paint pen (LOVE!!!) to add those black notches along the bottom edge. I also used Golden's Light Molding Paste thru the Crafters Workshop Chicken Wire stencil for added texture. 


 Circles??? Shocker, I know! 


 The two on the left were done using Dylusions spray inks, salt and more of the off white spray. The black one was done with black gesso, then I sprayed Dylusions through one of the Artist Cellar Cathedral Stencils, then layed a different Cathedral Stencil over that and dabbed white gesso over the stencil so the ink would bleed thru. Another Cathedral Pattern on the far right. 

 I really like the depth of the layers I got on the one on the far right. 

Another salted and sprayed folder on the far right. 


Another black gesso folder on the right with Twinkling H2O's splattered about. 

As you can probably surmise, when I go, I go big! I don't do anything 'just a little'. That may explain a lot if I ever show you pics of my 'studio'! Story of my life! 

Hope you enjoyed my inky folders and will colorize your workspace with some of your own! 

Thanks for stopping by! 

Friday, November 30, 2012

My FAVORITE Art Journal -- Dylusions!

Have you tried the Dylusions Art Journal? By far my favorite journal of all time!
I love everything about this journal. The size is perfect for either single pages or spreads, the paper is very heavy, high quality card stock and watercolor papers interspersed with alternating signatures of each, love the hard plain cover that begs to be customized, and the large envelope on the inside cover. Dyan really thought of everything when she designed this journal. The papers are perfect for the Dylusions Spray Inks. No gesso needed! In fact, I think you'll agree that you'll get better results without it. I use a dab here and there as I develop my layers, but there is no need at all to gesso the whole page before you start. 

I got my first one from The Queen's Ink when they first arrived, then quickly bought my second one. Then I bought two more. Then when Dyan was teaching at the Queen's Ink in early November, she mentioned that there were only 71 left in stock at Ranger -- I had no choice but to buy two more! (Yes, I need a 12 step program for art supplies!). Dyan mentioned that the next time the journal is produced, the price point will go up a bit to maintain the level of quality, and the paper will be one single type of paper rather than both. Personally, I thought the original $19.99 price point was a bit on the low side, especially after I held the first one in my hands and could feel the quality. YOU NEED ONE OF THESE JOURNALS -- (or 6, just sayin'!)

Once I started playing in the journal with making backgrounds and doing Dyan's ghosting technique (LOVE!), I couldn't stop! I've only completed a few pages, I'll get to finishing the rest at some point, but in the meantime, I've having a ball just making backgrounds. Here are some of the pages I've been playing with:

My favorite finished page so far. I love turquoise and orange together. You'll notice that I use washi tape down the center of each of my spreads. I do this not only because I love the look of washi tape, but I use it to try to keep the puddle of ink and water from seeping thru to the other pages of my journal. Yes, I'm one of those people that like to keep the pages cleaner if possible. 


 Again with the turquoise and orange! And I love this washi tape pattern.


 My butterfly page. 


And again with the turquoise and orange, but see what I mean? It just reallly pops. And that ghosted stencil, Aboriginal by Julie Fei-Fan Balzer of Balzer Designs, is really a favorite of mine as I'm sure you can tell by how often you have seen it and will see it in my work. 


 The large circles on this one has various colors of Viva Inka Gold on them. 


This pic isn't really great, but in person this spread looks really cool with the zipper washi tape down the middle. 

I love this paper I used to collage down the sides of the pages. It really speaks to me. And the wash tape? Yum!


 Got this really funky stencil on Etsy. Love the SouthWest theme of it. 

And a finished page in the Dylusions style I love. 


This spread has some Lindy's Stamp Gang Starbursts added.

I was playing with my Stamp Zia Spray Inks on this spread. 


 Colbalt Teal - does it get any better than Cobalt Teal by Golden Fluid Acrylics. 


I LOVE CIRCLES!!! And this page really shows how vibrant the Dylusions Inks are. My favorites! There's some black and white fabric tape on this page as well.


Another Etsy stencil with that SouthWest theme that I used to ghost the image. And really like this washi tape pattern too. 


And even more circles! This page has this really cool adhesive fabric tape I found on Etsy.

I'll post more pages when I can. I have a very busy weekend coming up at the Queen's Ink -- Donna Downey is in town! I'm in all four of her classes starting tonight! I'll be sure to post about some of the fun!

Thanks for stopping by!